Have you ever thought of installing on your PC? I know many
of your surely have like I used to do. Before this, I used to think that I
won’t be able to install Android on PC. If you love android and iOS and always
face dilemma that which one should I choose. Then this one is surely worth
reading for you and don’t need to spend lots of bucks to buy a new android
device. You don’t need to be a nerd or a
computer science engineer to perform these steps. If you know how to operate a
PC then this much knowledge is more than sufficient.
If you
know about virtual machine software, which lets you operate two Operating
System simultaneously then here we will also be doing the same using Virtual
Box. If you are thinking that you are doing something illegal then I must
remind you that Android is based on Linux kernel and Linux is open source.
STEPS TO INSTALL ANDROID ON PC:
STEP-1: You will need to install two software first.
a)
Oracle VM Virtual Box: LINK
From here, download virtual box according your system.
b)
Live Android, a live CD for Android running on
x86 platforms: LINK
STEP-2: Once you have installed Virtual Box, open it and click on New and enter the required
fields.
a)
Name: anything you want to name it.
b)
Type:
Linux (Since Android is based on Linux Kernel)
c)
Version : Other Linux (See image below)
STEP-3: In next
dialogue box, you need to enter the memory size. 256 MB is recommended but I
will suggest you 512MB for smooth
operation.
STEP-4: Now you will need to create a virtual hard drive or use an existing one. However, creating new
virtual drive is recommended. Then select
VDI and choose fixed allocation.
Allocate 2GB of memory and then
click on next to create the hard disk.
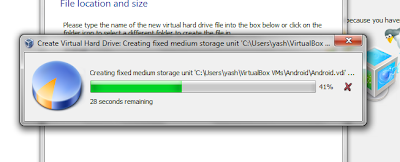 |
| (Creating Virtual Disk) |
STEP-5: If you have followed
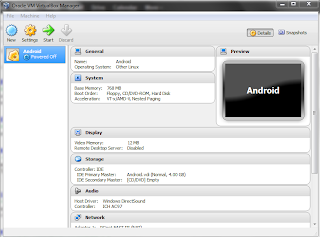
all the steps correctly, there will be a virtual device of your name(See image below). Now you
need to mount the downloaded Live Android
.iso file.
STEP-6: For mounting, go to Setting -> Storage. Select empty under “Storage Tree” and under “Attributes”,
choose liveanroid.iso file or CD/DVD
option by clicking on the right icon. Now select that file and click ok.
 |
STEP-7: Now back under the Setting dialogue, select System tab and under “Motherboard”, Extended
Features uncheck “Enable absolute pointing device”.
STEP-8- Now it is the most important and critical system if
you don’t do this you won’t be
able to use your virtual Android OS. Can you
guess what? Just turn it on by select START
icon from the top.
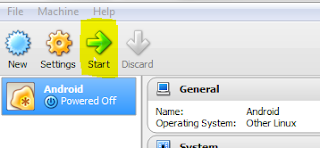 |
| (Click on START) |
Guess what? You are done. Was that difficult? I hope not. Now enjoy complete android experience on
your laptop or PC’s.
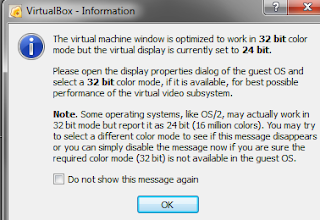
Note: You will see some prompts in between when you will Power
On your android OS, don’t get hyper, just click them OK and also select the "Do
not show again" check box (See image below).
 |
Below is a screenshot of the Android OS running on PC. This window will be shown if you have performed all the above steps correctly.
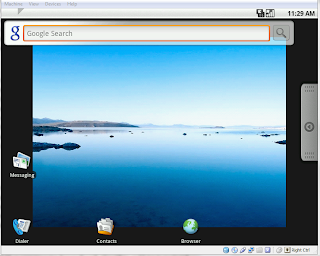 |
| (PC running Android OS) |
If you have any queries during installation, tell us your problems and we will help you to solve them.



i have installed this software but after installing it, it shows only black screen...........what to do next?????
ReplyDeleteYou are not getting the picture that i have shown last on this page?
ReplyDeleteyes i am not getting it
DeleteThen you might have allocated less memory or RAM. Just check all the requirements and follow all steps properly.
Deleteyes i am not getting it
ReplyDeleteits showing machine view device and help in the tpo of the window but there is a black colour background in the window........what i have to do after that??????
ReplyDeletehow i can use this software?????? its applications??????
ReplyDeletein the step 7 which features i have to check or uncheck ?????
ReplyDelete